DIY

DIY Denim Cut Offs (Plus Size)

April 22, 2014

diy_denim_cutoffs
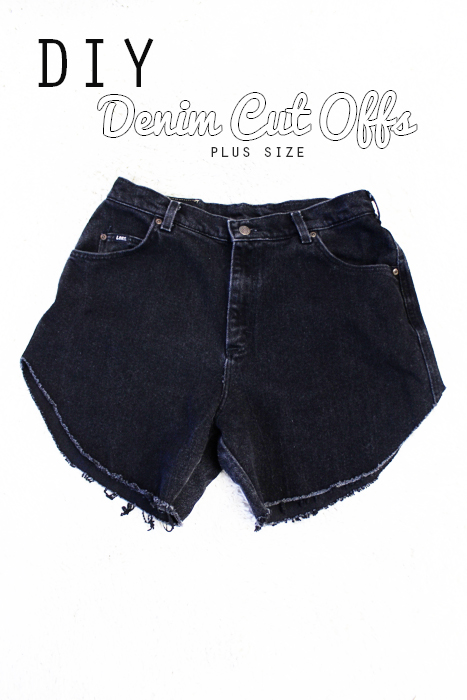
Vintage style denim cut offs are the thing right now for summer/spring fashion.  Do you love this trend and they don’t come in your size? Want a low cost and easy DIY to make your very own vintage style denim cut offs? Then follow this fast, simple, and easy DIY Denim Cut Off Tutorial!


SUPPLIES

  1. Thrifted/Old Denim Pants
  2. Tailor’s Chalk (or Water Based White Colored Pencil)
  3. Ruler (Optional)
  4. Scissors
  5. Washing Machine & Dryer


STEPS

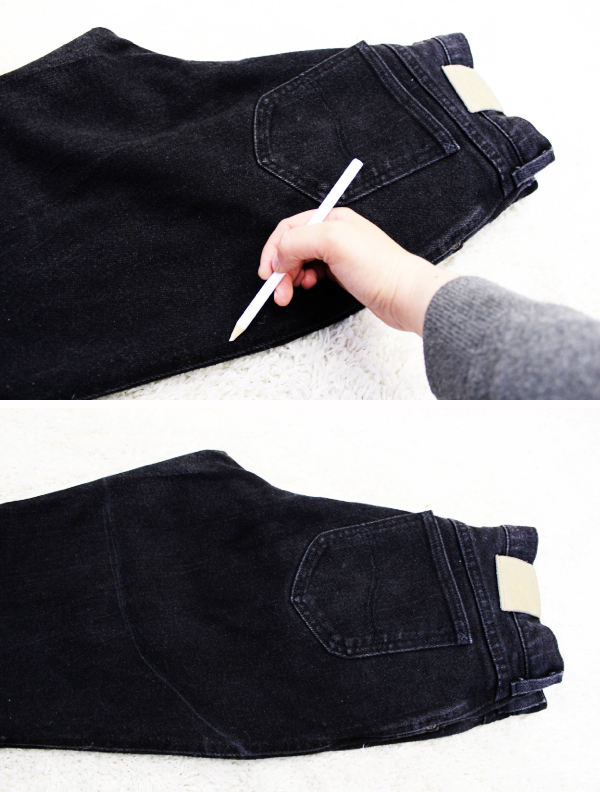
1. Try on pants while looking in a mirror and using Tailor’s Chalk, mark on the side seam where you want your new shorts hem.

Mark_Pantleg


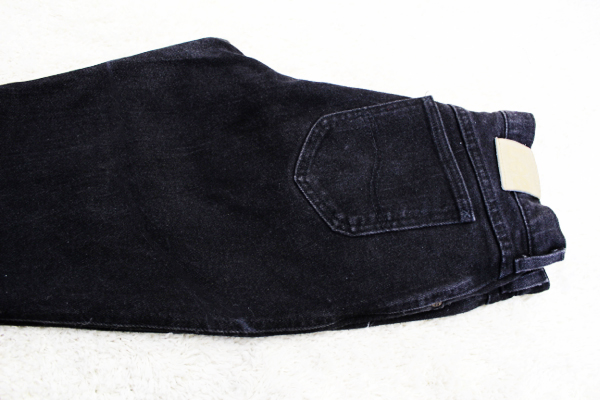
2. Take off pants. Fold pants in half  (back facing out), perfectly aligning all edges and lay on a flat surface.

lay_flat_fold


3. Using your Tailor’s Chalk, either:

[A] Free hand sketch the new hem cut line at the mark made at Step 1.  -OR- 

[B] Using a Ruler, line it up with the same cut line made at Step 1 and draw a straight line for a new hem cut line.

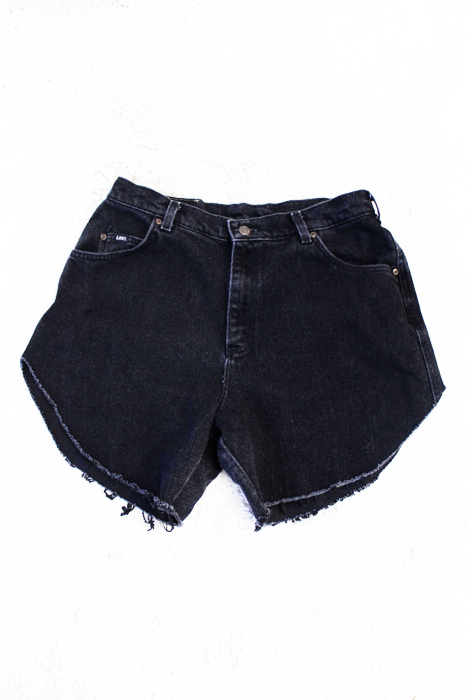
**In the sample shown, I made a curved hem with the side seam higher than the inseam.

freehandsketch


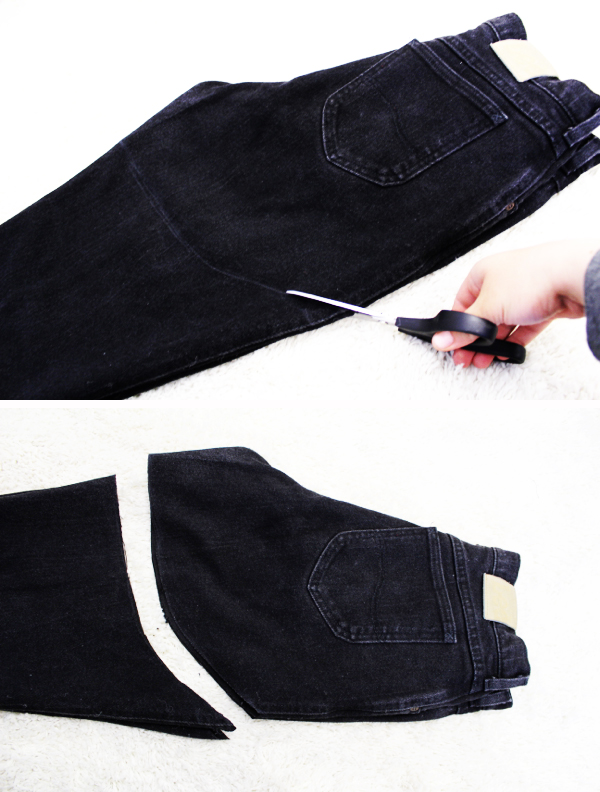
4. Take your Scissors and cut through BOTH Pant Legs at the drawn cut line.

cut


5. Throw your shorts into the Washing Machine and Dryer to get that “frayed hem” look.


6. Try on your new shorts! You’re Finished!

IMG_2358


Plus Size Cuffed Shorts DIY

July 18, 2013

 
Last year, one of my VERY FIRST DIY’s for this blog was “Plus Size Cuff-Off Shorts.” Today’s DIY is an extension of this early basic DIY. I am going to show you how make Plus Size Cuffed Shorts using the “cut-off” method plus a little bit of hand sewing and ironing.
 
SUPPLIES
- 1 Pair of Pants
- Scissors
- Ruler
- Tailor’s Chalk (or Water-Soluble Colored Pencil) 
- Iron
- Straight Pins (Optional)
- Sewing Needle
- Thread
STEPS
1.  Put on a pair of pants to be DIY-ed.
2.  Decide where you want your shorts to end and make a small mark with TAILOR’S CHALK on the SIDE SEAM of one of the legs as a guide.
3. Take off pants and lay them facing up on a flat surface.
4. Using your ruler, measure from the hem of your pant to the mark you made on the side seam. You will need this measurement for following steps!
5. Go to the INSEAM of the same pant leg. Measure up from the hem using the measurement from above. Mark the measurements with TAILOR’S CHALK.
6. Using your ruler, draw a line connecting the two measurement marks. This is your “new hem line” aka FOLD LINE #1.
7.  Measure down 1″ from your FOLD LINE #1. Draw a straight line using your TAILOR’S CHALK.  This is FOLD LINE #2.
8. Repeat Step 7. This is your CUT LINE. Your lines should look like the following:
9. Repeat STEPS 4-8 on second pant leg.
10. Cut pant legs on the CUT LINE
11. Go to your ironing board/ironing area. Fold NEW PANT HEM (used to be “Cut Line”) up to FOLD LINE #1 and iron in place. Repeat all the way around the pant hem. Repeat for BOTH LEGS.
12. Fold pant hem up one more time to FOLD LINE #2. Iron in place. (Optional: Pin in place with straight pins, if needed)
13.  Taking your SEWING NEEDLE and THREAD, tack down the cuff at the side seam and inseam of both cuffs/pant legs.
14. Try on your new cut-off shorts!
 
Bloglovin’   //   RSS Feed 


Facebook   //   Instagram   //   Tumblr    //   Twitter  //  Pinterest   // Polyvore

All rights reserved © 2012-2017 The Curvy Elle & Laurel Teixeira · Theme by Blogmilk + Coded by Brandi Bernoskie