I love elastic. It’s not what you’re thinking. I love it because it makes so many more things wearable by a diverse group of body types! It also can be very comfortable, and I love comfortable. If you add fashionable to that, even better!
This is a vintage inspired (very simple) DIY Swing Skirt (basic full skirt) that can be used for any size. It is basically 2 squares and some elastic made into a skirt. This skirt is basic, with a vintage flair! Happy DIY-ing!
Supplies:
- Woven Fabric (Take your measurements before buying your fabric for correct yardage.)
- Non-Roll Elastic (Preferably about 1″ wide, but you are welcome to try any width.)
- Tape Measure
- Scissors
- Pinking Shears (Optional: If you have a Serger/Overlock Machine, than use that instead.)
- Straight Pins
- 2 Large Safety Pin
- Iron
-
Sewing Machine
Prep:
Pre-wash your fabric to avoid later shrinkage. Once washed, if fabric is wrinkled, press fabric with an iron before starting this DIY.
1. Take your
Waist Measurement using your tape measure. (This is where you want your skirt to lie on your body.) Note this measurement for future use.
2. Figure out where you want your skirt’s hem to hit you. Measure from your waist, down to this spot using your tape measure. This is your
Skirt Length. Note this measurement for future use.
3. Take your
elastic, wrap it around your waist so that it is taught and let the end
over lap about 1″. Cut your elastic at this measurement. Set the elastic aside for later use.
Then, tear the selvage from the fabric until they are separated.
Repeat for second selvage edges. You will end up with raw edges on all sides of your fabric.
5. Lay your fabric out on a flat surface. You are now going to measure out your 2 rectangle pieces.
Waist Measurement + 1.5 inch (For Seam Allowance)= Width of Skirt Body
Skirt Length + Elastic Width (Mine is 1″) + 2.75 inches (For Hem and Waist Seam Allowance)*** = Height of Skirt Body
***If you are using a SERGER/OVERLOCK MACHINE, change this to 1.75″.
6. With the above measurements, you are going to make TWO IDENTICAL RECTANGLES. On your fabric measure out the Width of Skirt Body and make a 1/2″ snip. Tear the fabric at this point until excess fabric is separated. (Same technique as above!)
7. Once the above is done, measure out the Height of Skirt Body and make a 1/2″ snip. Tear fabric at this point. (Same technique as above!)
You will now have your first rectangle. Repeat this step with the remaining fabric. You will end up with TWO IDENTICAL RECTANGLES.
8. Trim all raw edges with your pinking sheers. Try to cut 1/4″ or less off from the edge. You are simply making a clean finished edge.
—> If you are using a SERGER/OVERLOCK MACHINE: Finish all edges. Try to only trim off 1/4″ or less.
9. Line up your finished edge fabric rectangles, right sides together, and pin one side seam (this is your Height of Skirt Body edge).
Sew this seam with 1/2″ seam allowance.
Press seam open and flat with an iron.
Repeat for the second side seam.
10. On one of the Width of Skirt Body edges you are going to make the casing for your waist elastic to go in. Flip the edge in, the amount of this your Elastic Width + 1/4″, (mine would be 1 1/4″). Press and pin in place.
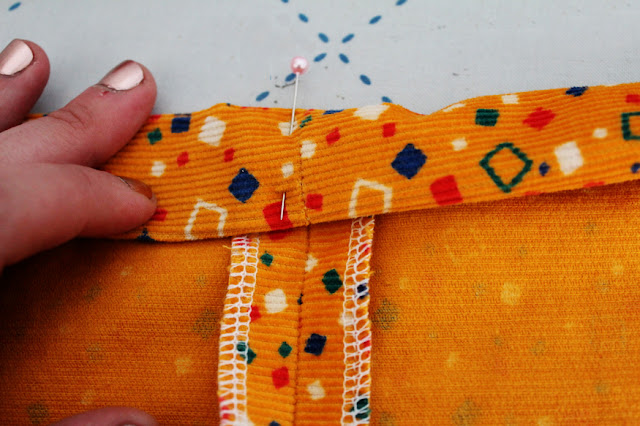
Somewhere along the edge, measure a 2″ wide area and mark this area off with double pins. This is your “NO SEW AREA.” This is where you will insert your elastic for your waistband, so you DO NOT SEW this area.
Your seam allowance for the casing is: the previous measurement MINUS 1/8″ (mine would be 1 1/8″). Sew all the waist, except for the 2 inch wide “NO SEW AREA.”
11. Now, you will need your elastic and 2 safety pins. Attach one safety pin to ONE END of your elastic.
Attach the second safety pin to the opening of your waist and to the SECOND END of your elastic.
12. Start to feed the elastic into the opening, using the end with the FIRST safety pin. This may be a little difficult until you get the hang of it. Take this step slow, and have patience!
13. Once you have the elastic fed through the waist, take off the two safety pins. Pin the two elastic ends together, overlapping about 1 inch (this doesn’t have to be exact).
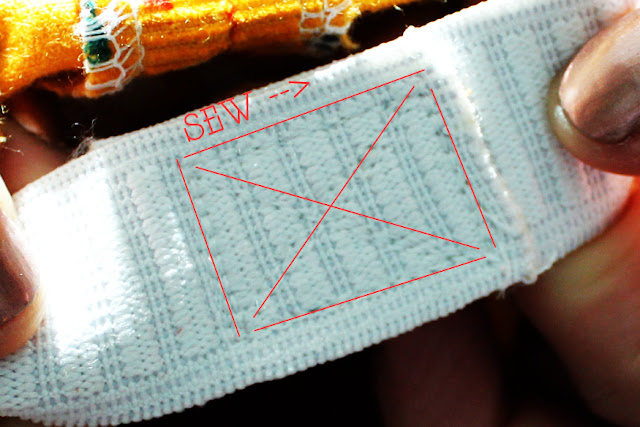
14. Sew elastic together, sewing a box shape with an “X” through it. You will want to repeat these sew lines a couple of times for strength.
15. Now, you will close up the opening in the waist (your “NO SEW AREA“). Top
stitch the seam opening until the hole is closed, make sure you DO NOT SEW THE ELASTIC. You want to be sewing fabric against fabric. This may be a little tricky, because your waist will be shirred a large amount. Try pulling your elastic taught as you sew. You can also pin the fabric in place ahead of time.
16. Finally, you are going to hem your skirt. On the last untouched edge, you will measure up 1 inch (on the inside of your skirt), iron the 1 inch in place as you go. You will repeat the abov
e step, turning the edge up 1 inch more, iron and pin in place as you go.
—> If you are using a SERGER/OVERLOCK MACHINE: You will only need to do ONE, 1 inch turn up. Iron and pin as you go.
17. Top Stitch along the edge of your hem. If you are being adventurous, try using a zig-zag stitch for a fun detail! Press the hem and skirt one last time.
18. Try on your lovely new full skirt! You are done–congratulations!


